The biggest geomagnetic storm in over 20 years is hitting the Earth this weekend, and it’s leading to the Northern Lights being visible in huge portions of the Northern hemisphere. Here’s how to take a picture of the Northern Lights using a Google Pixel smartphone or other Android devices.
The Northern Lights – aurora borealis – are usually only visible in far north portions of the globe. They’re a result of solar storms passing by the Earth and the charged particles interacting with gases in the atmosphere. It’s a dramatic view in the sky, and this weekend it’s visible in parts of the globe that rarely ever see it. That includes wide portions of the United States.
Starting on May 10 and also occurring on May 11 – albeit not as strong – you can look up and see aurora borealis. This will vary depending on where you live, the level of light pollution, and many other factors. To the naked eye, you might notice some colors in the sky or a slight tint, but a camera can actually see more in the right conditions.
Using a long-exposure mode on your camera, such as Google Pixel’s astrophotography, you can capture the Northern Lights in a way that looks even better than it does to the naked eye. Here’s how to do it.
To start, you’ll need two things. A dark environment with minimal light pollution, and a tripod.
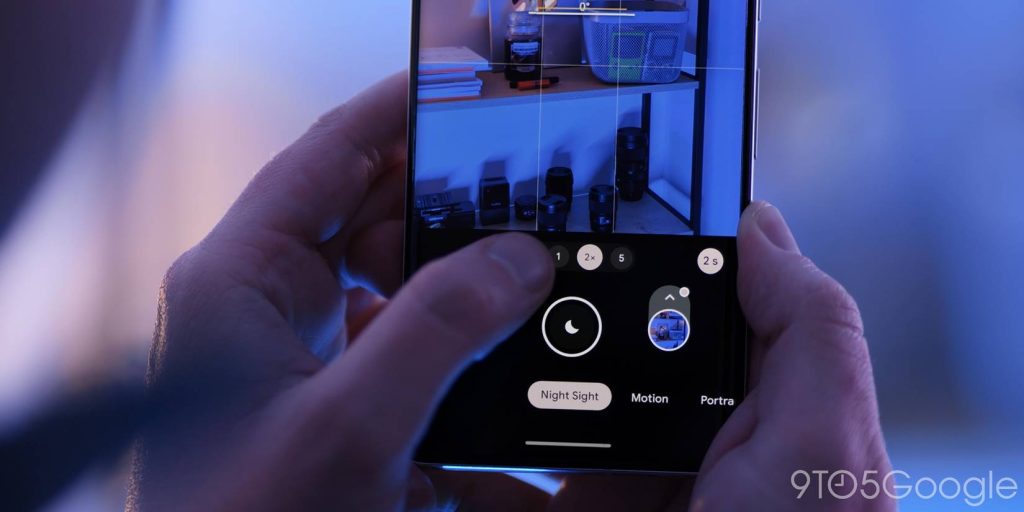
Mount your phone to the tripod and open the camera app. Then, on a Pixel, switch to the “Night Sight” mode along the bottom bar. If the Northern Lights are already clearly visible to your eye, you’ll probably be able to capture it just using Night Sight on its own. But astrophotography can capture much more detail, and a time-lapse too.
To trigger astrophotography on your Pixel, set the phone on a tripod and ensure it’s on a steady surface. After a few seconds staying still, you’ll see a star icon (see image above) appear on the shutter button. Gently tap that button and then your phone will start the process which can take up to 4 minutes.
Once the shot is finished, your phone will process the image and export a still photo as well as a time-lapse of the shot, which is especially fun for capturing the Northern Lights.
Here are a couple of shots we captured from North Carolina during the first night of the aurora borealis on May 10.
While not many other Android phones have dedicated modes for astrophotography, you can still capture a good shot with standard night modes. Most phones, including Samsung Galaxy devices, will switch to night mode automatically when it’s dark enough.
A good rule of thumb would be that if you can see the Northern Lights with the naked eye, you phone’s standard night mode can probably capture an image of it too. If you can only barely see the aurora, you’ll likely need to dive into a manual shooting mode and look for long exposure options.
On modern Samsung Galaxy devices, you’ll be able to access long-exposure in two ways. Under the dedicated “Night” mode, you can switch from auto exposure to “Max.” Alternatively, you can dive into the “Pro” mode and crank up the “Speed” to 5 or 6 seconds. Like with Pixel, you’ll absolutely need a tripod for this.
If you’ve taken or use this guide to take pictures of the Northern Lights with your Android phone, share them in the comments below!
More on Android:
Follow Ben: Twitter/X, Threads, and Instagram
FTC: We use income earning auto affiliate links. More.

Michael Johnson is a tech enthusiast with a passion for all things digital. His articles cover the latest technological innovations, from artificial intelligence to consumer gadgets, providing readers with a glimpse into the future of technology.